 | Certain schools may offer their community the ability to design a set of 2 or 4 pages that are inserted into their child's personal yearbook. If your school offers this product, you will find it under the Current Yearbook Extras section of the store. |
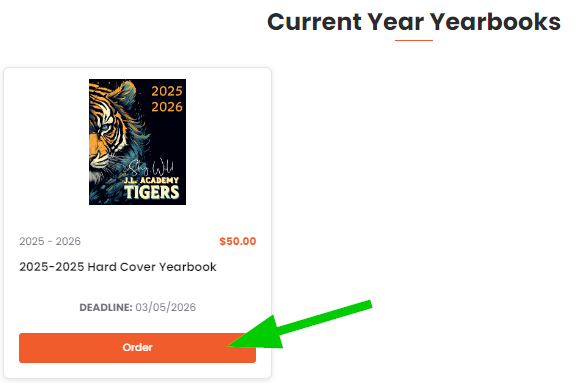
Step 1: Add a yearbook to your cart.
Before working on custom pages, first place a yearbook product in your cart. Custom pages may not be added to your cart without purchasing a yearbook product.
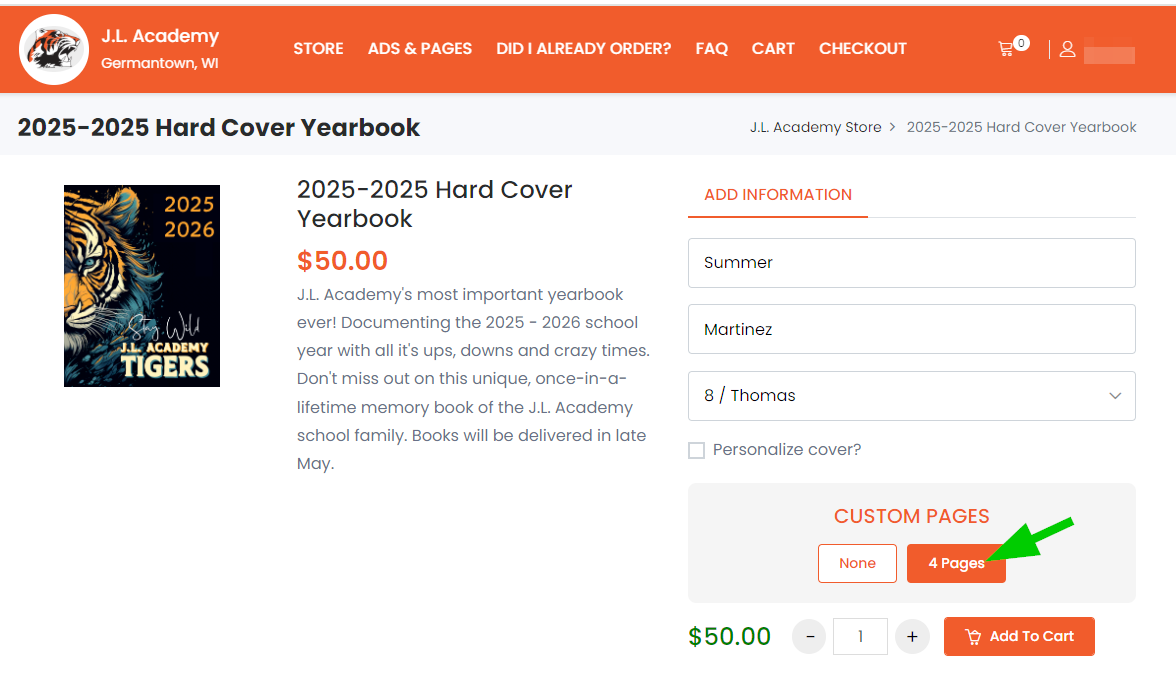
Click Order on the yearbook product, then complete the order form. Choose the available custom pages option (either 2 or 4 pages, as per your school's choice). Add the yearbook to the cart.
 |  |
Step 2: Sign in to create your pages.
Purchased an ad or custom pages previously in the Yearbook market? Log in. 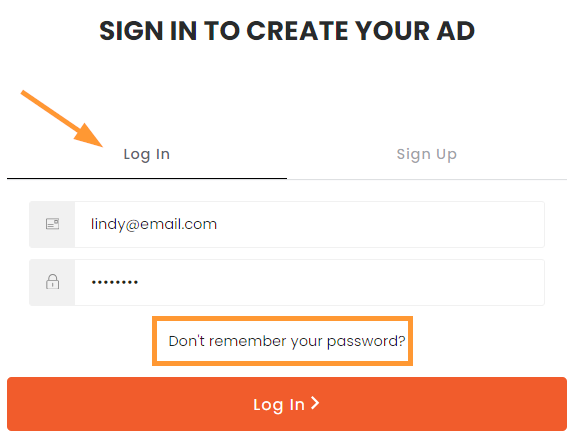 Don't remember your password? Click on the password reset option below the form. | New to Yearbook Market? Sign up.  A login is required to save your work in progress. A login is required to save your work in progress. |
Step 3: Click on the New Custom Pages button.
(If you have already begun work on pages, click on your work in progress.)
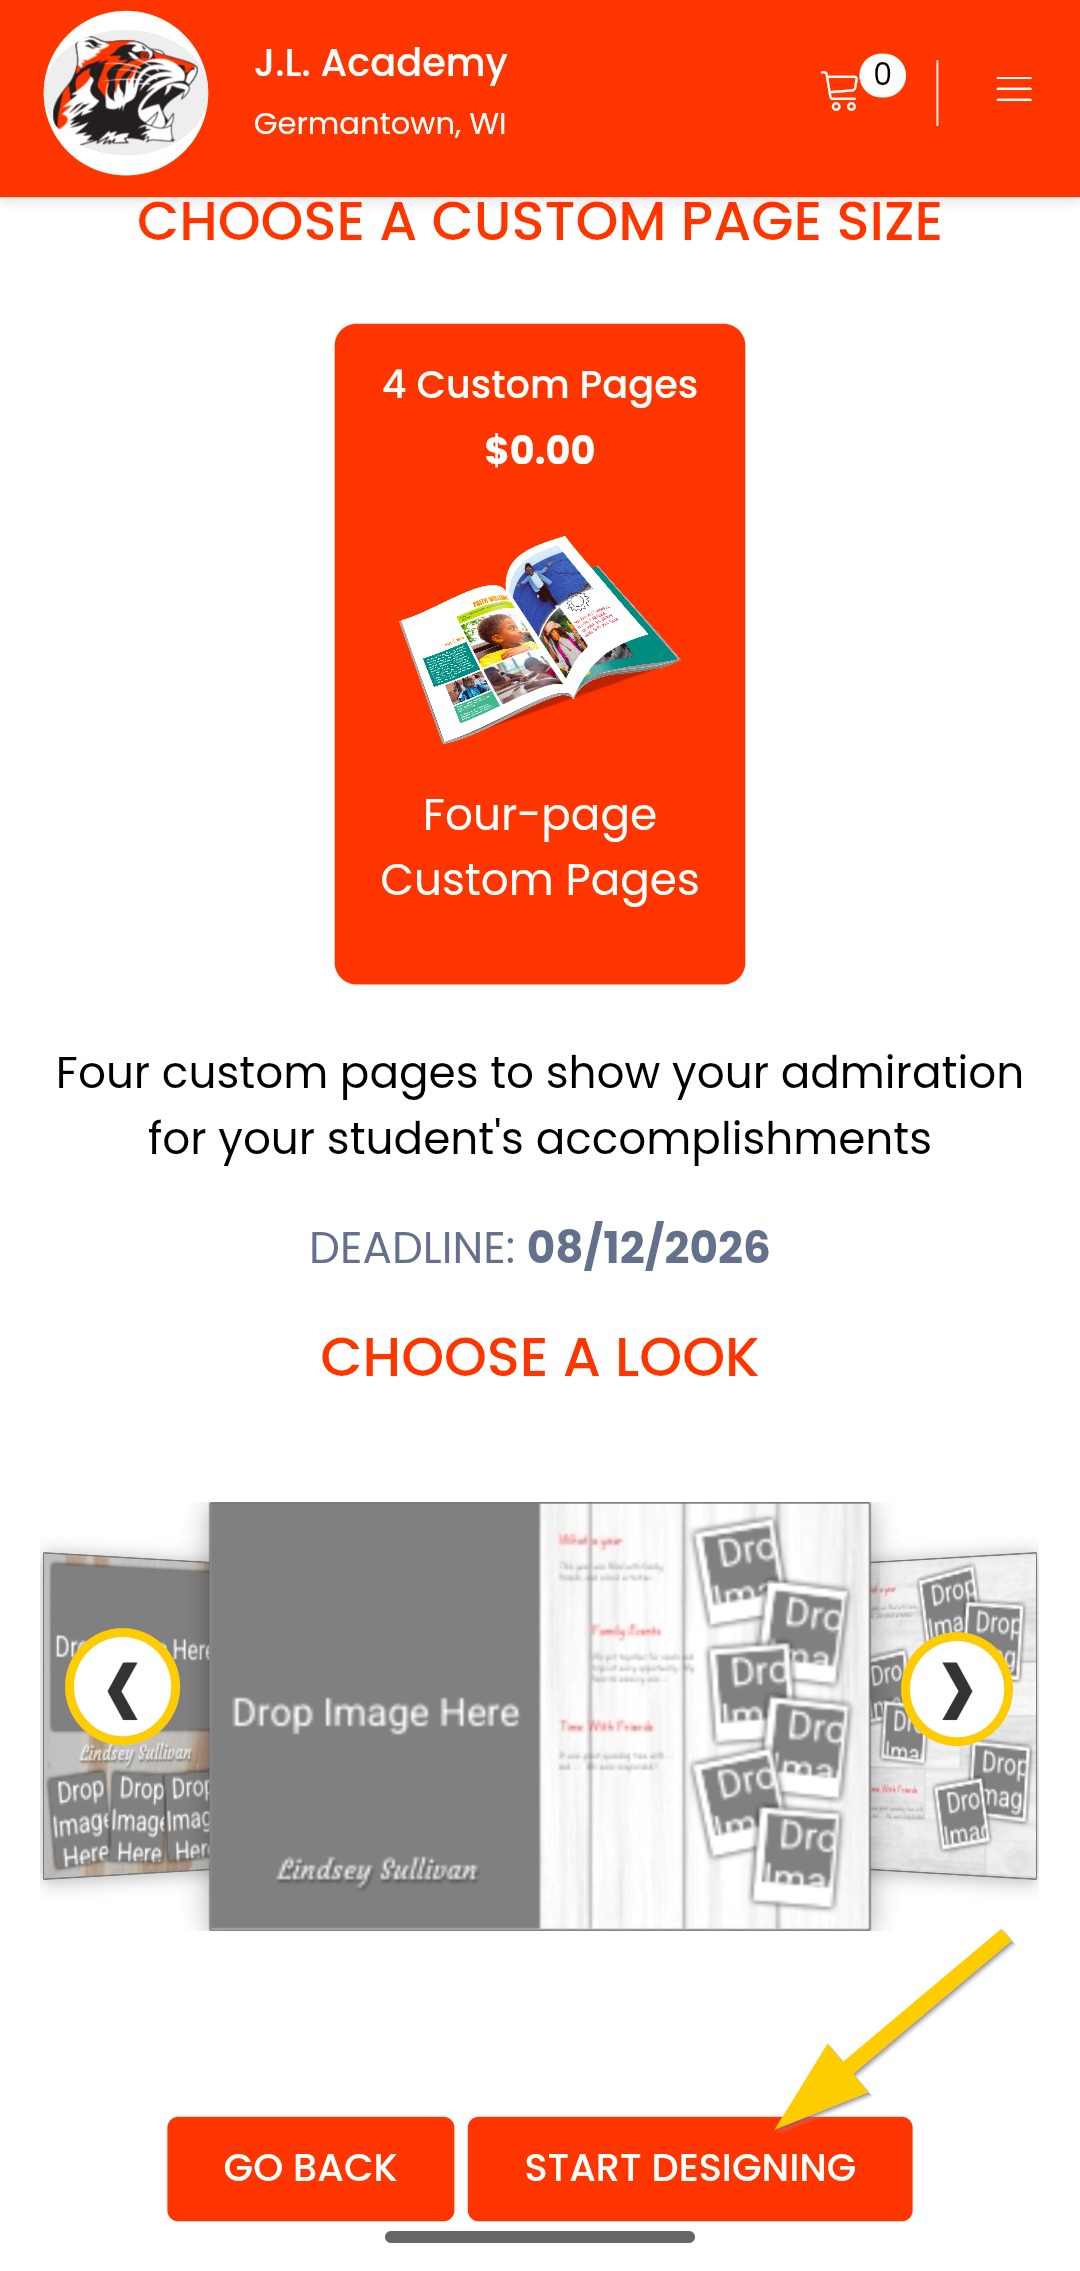
Step 4: Choose a template.
Cycle through the available options using the side arrrows, then click Start Designing to launch the editor with the selected template.
Step 5: Edit the first two pages (A) of your design.
- To change the layout, access Templates (B), then cycle through the options (C). On mobile, click Select (D) to apply the template; on a computer, the layout will auto-update.
On mobile 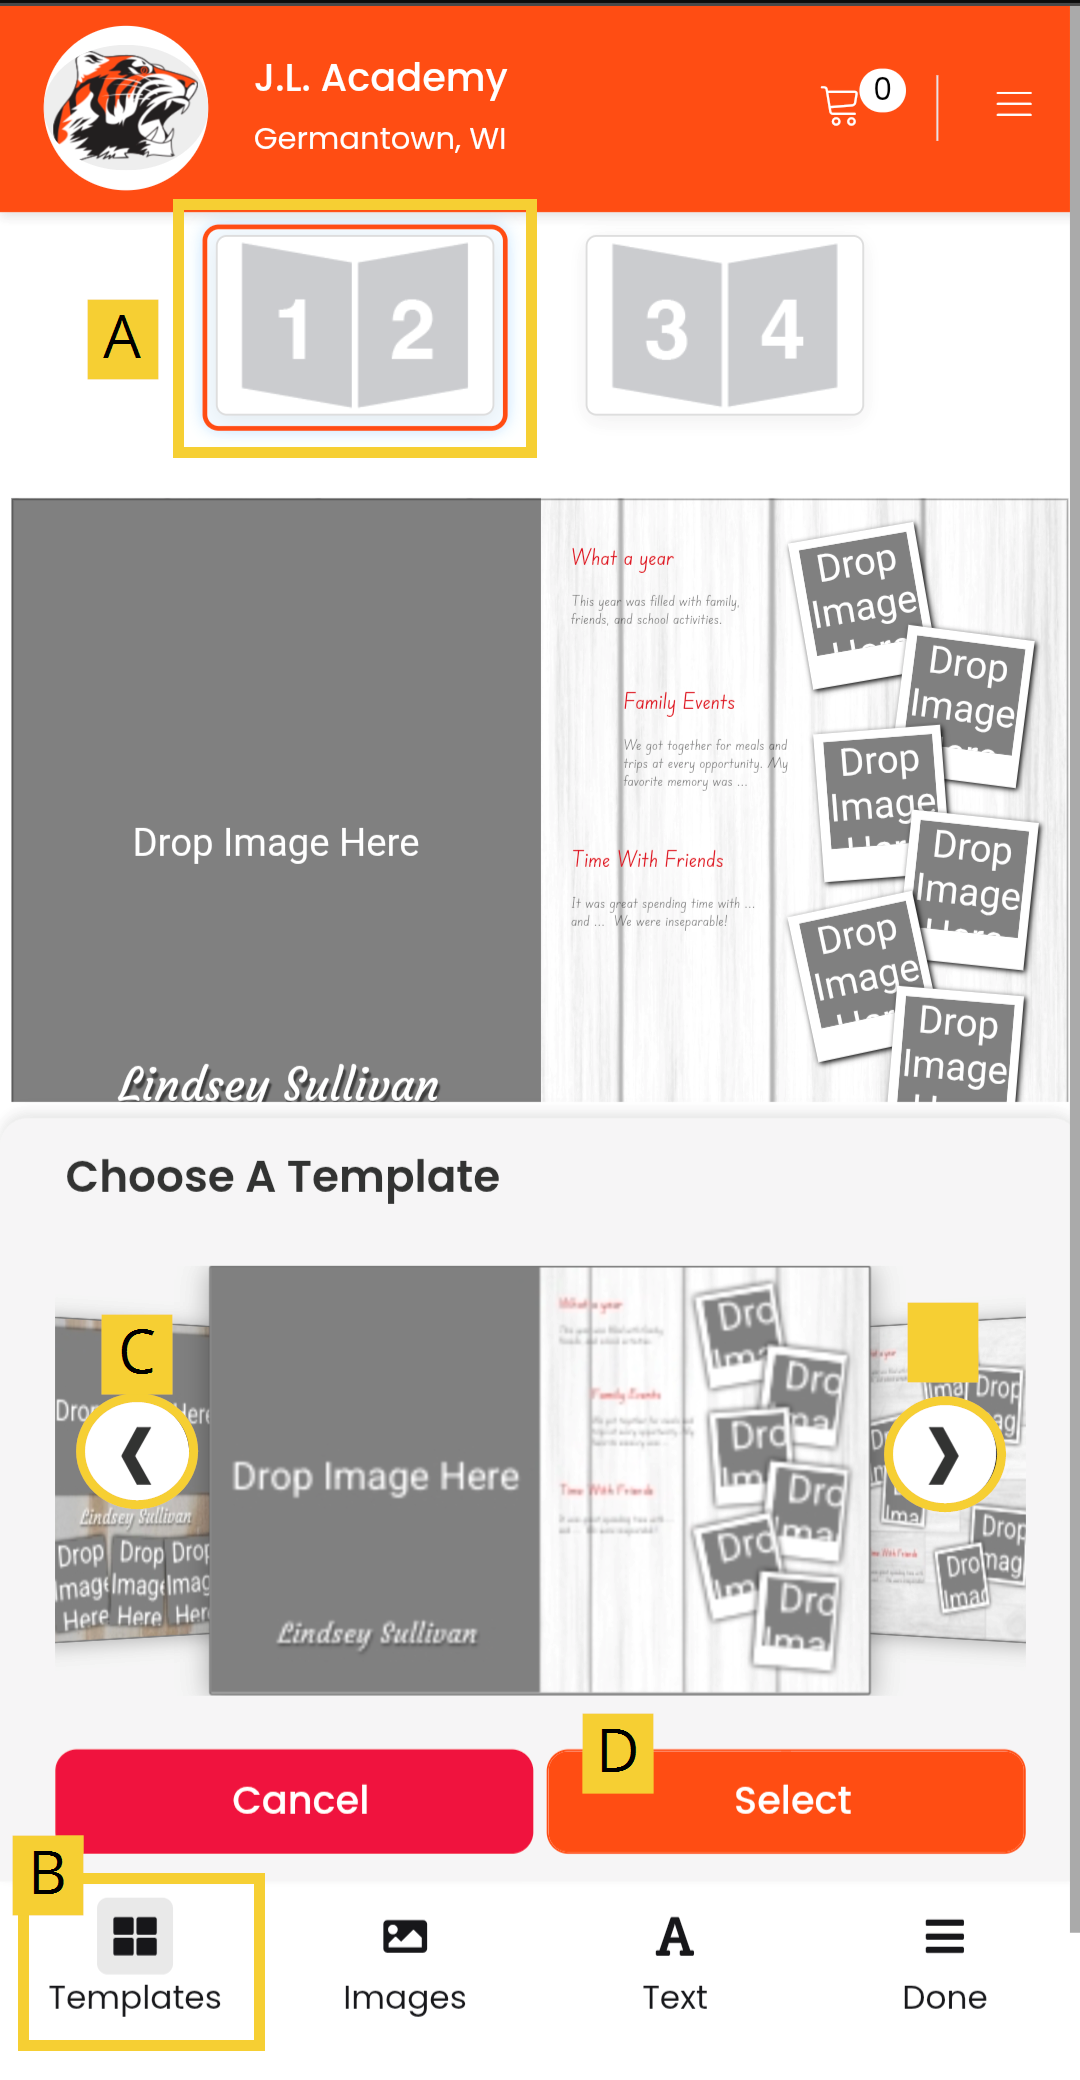 | On a computer  |
- Upload photos then add them to the template.
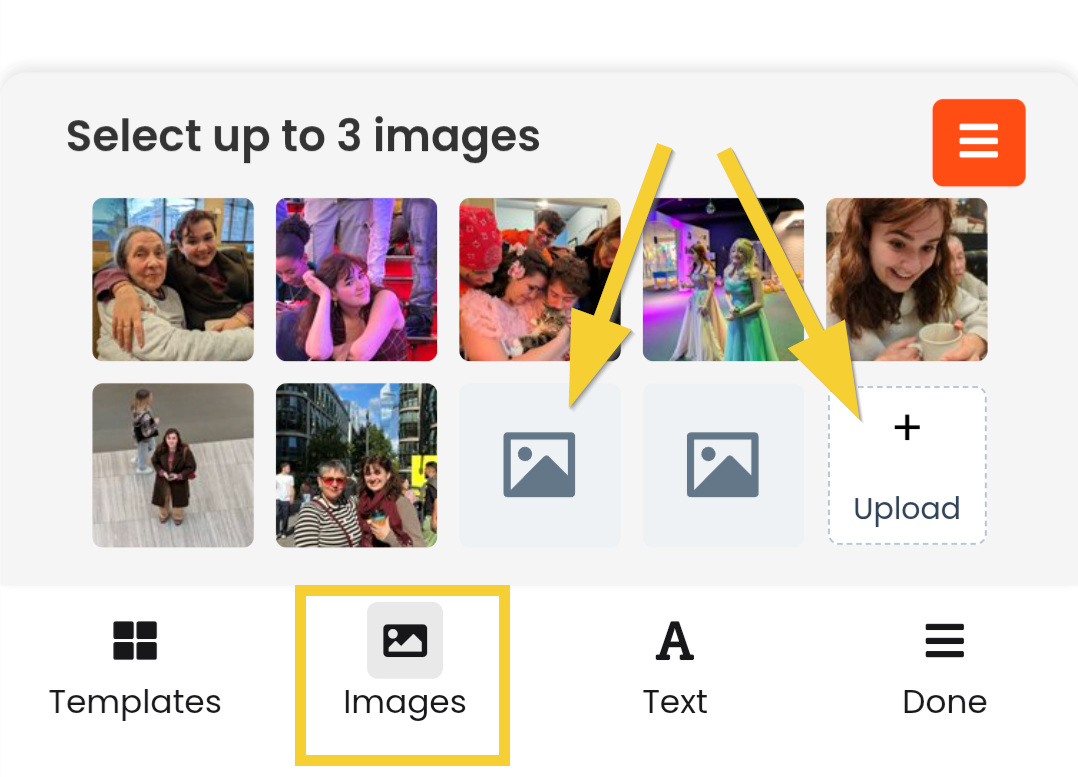
On mobile Click on the Images tab. Click on an empty image holder, or Upload to select multiple photos to upload.
| On a computer Click on an empty image holder, or Upload to select multiple photos to upload. 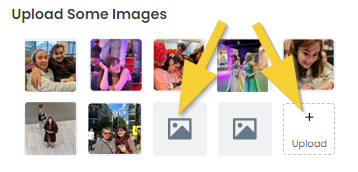 |
On mobile: Tap on a photo.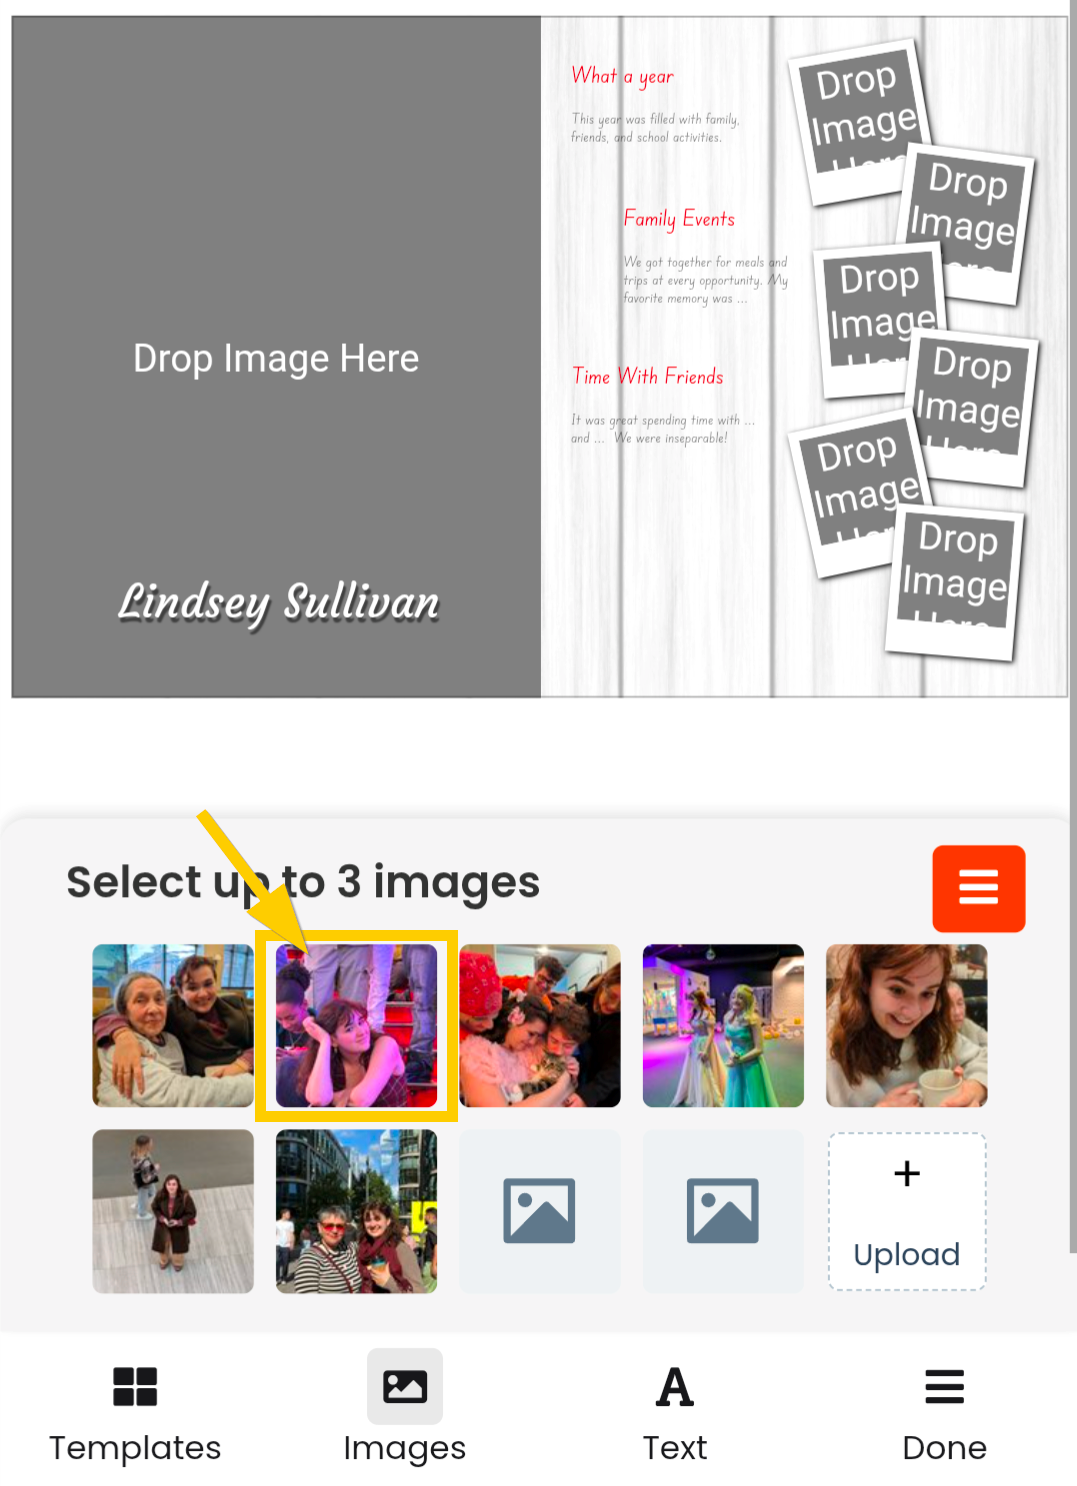 | On a computer: Select a photo. |
On mobile: Tap on an empty frame on the template.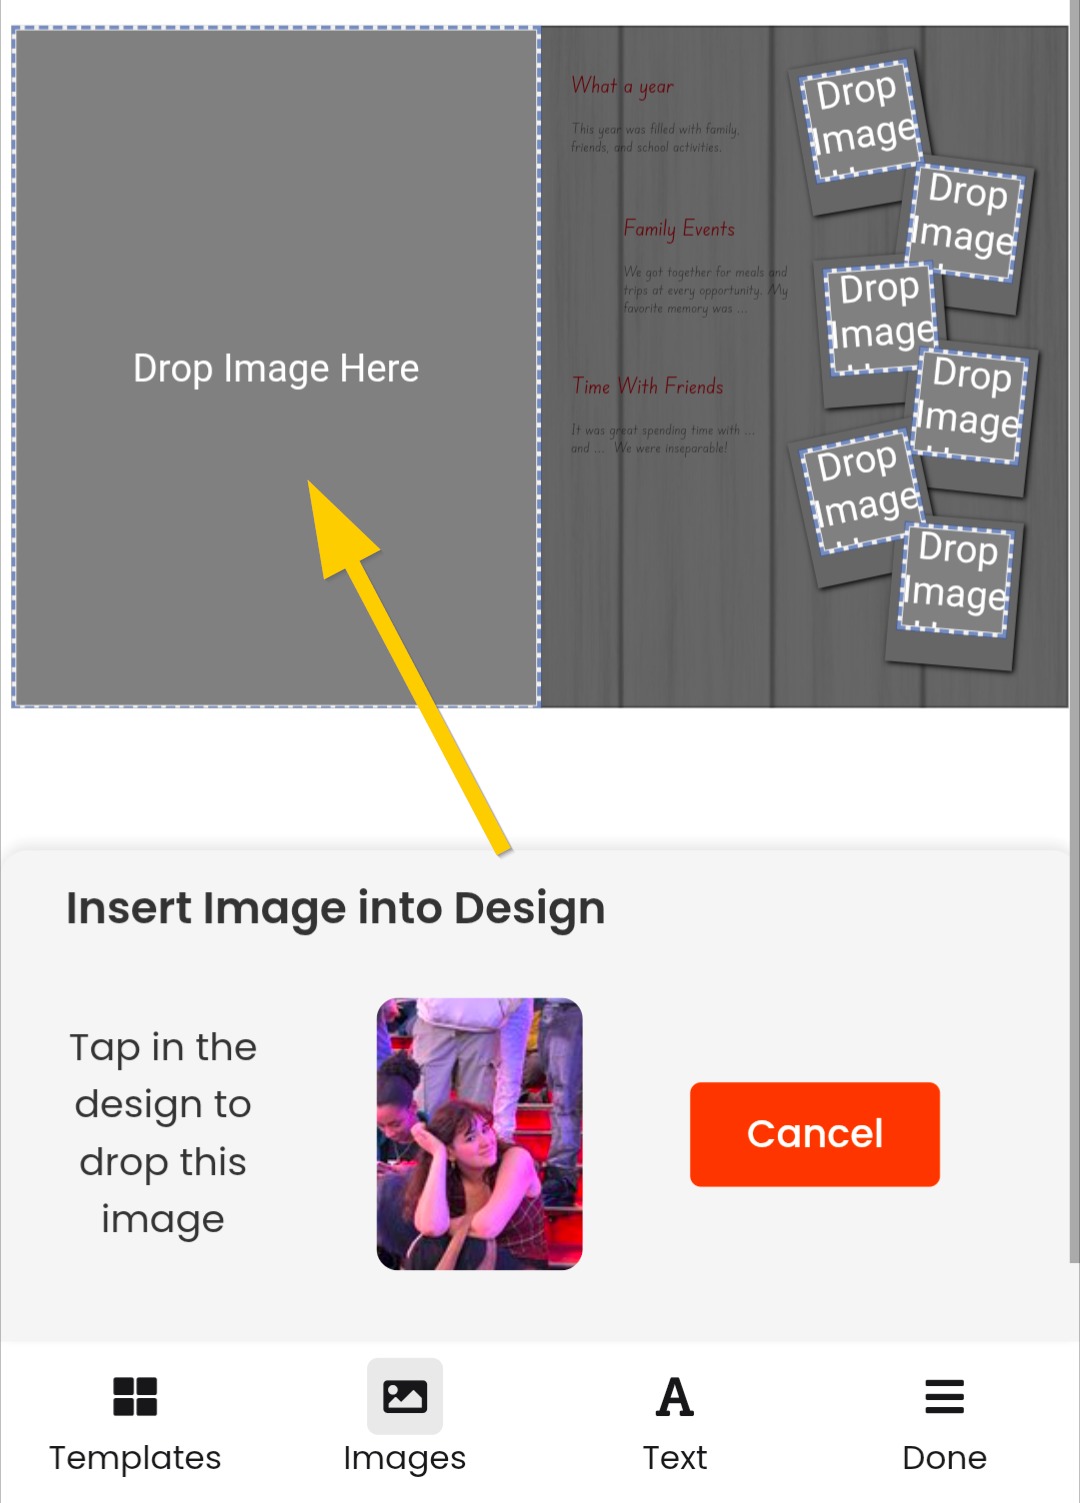 | On a computer: Tap on an empty frame on the template. |
On mobile: The image will appear in the template.. | On a computer: The image will appear in the template. |
Adjust the zoom by dragging on the magnifying glass icon, and adjust the position by dragging on the crosshair handle.
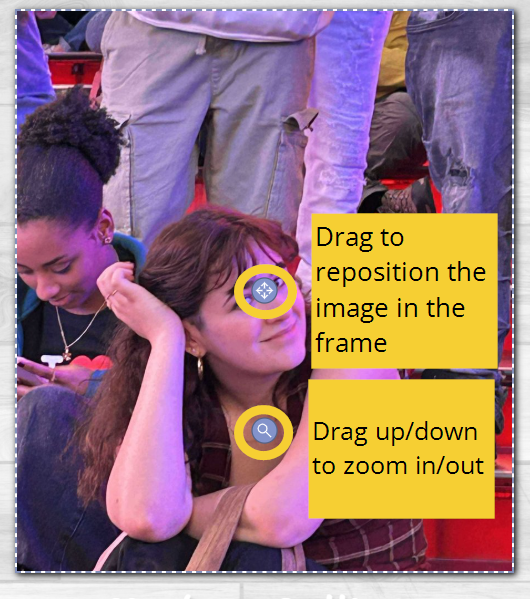 |  |
Note: on mobile, pinch your screen to zoom in for more close-up detail.
- Customize text by completing the form. Be sure to replace all text placeholders.
On mobile. Click on the text tab to access the form. Type in the form box to update text on the template. Note that it will automatically resize to fit the template. Move through the form by clicking the arrow buttons.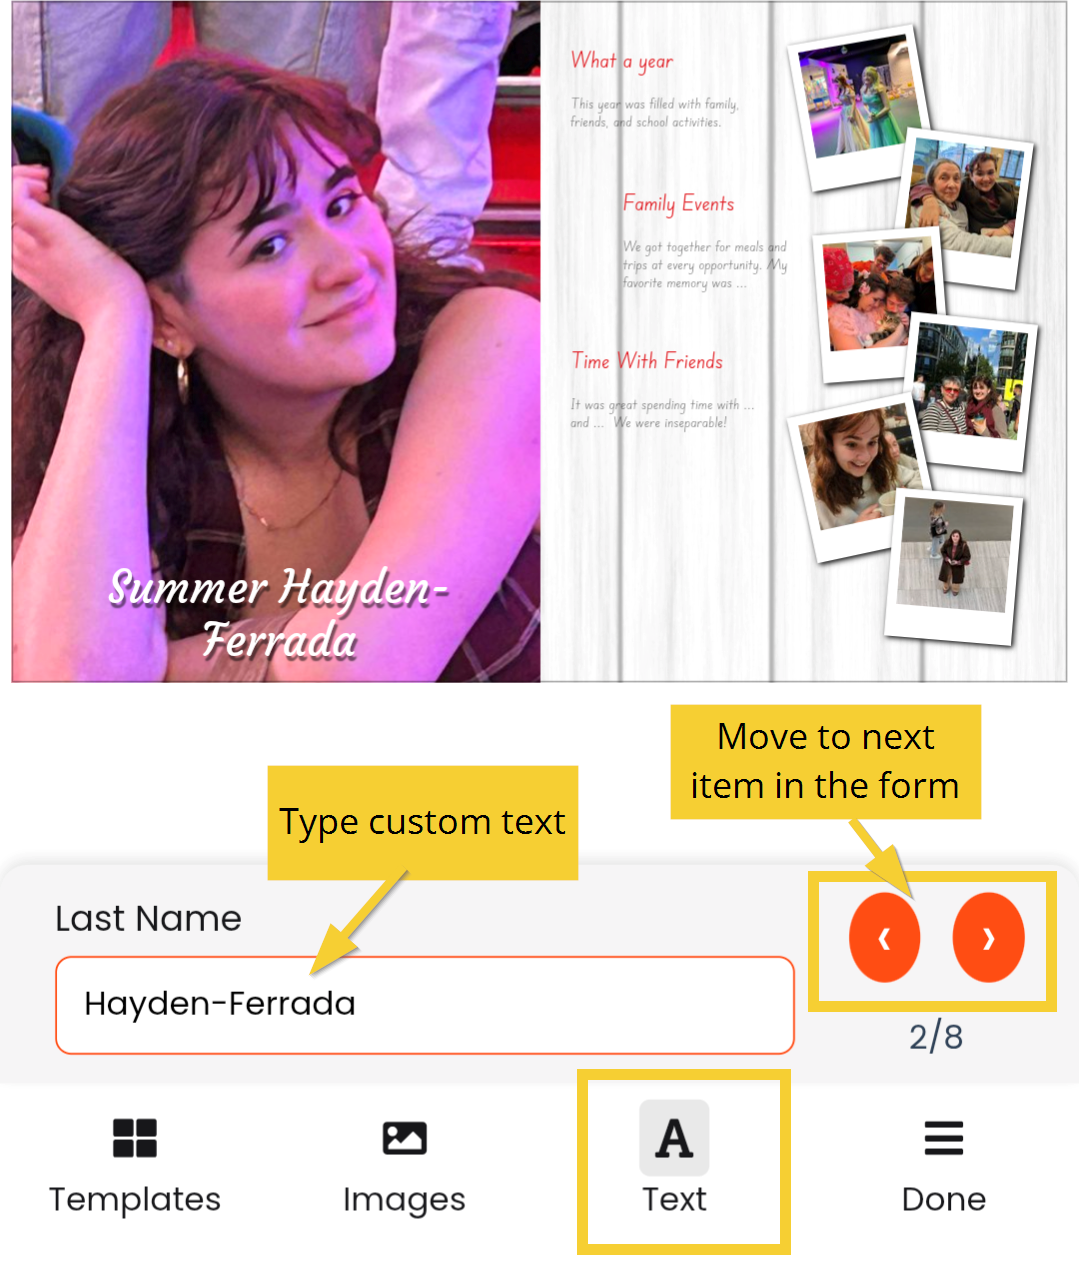 | On a computer: Add text to the form, scrolling down to complete the entire form. Your custom text will appear on the page as you type, resizing to fit the template.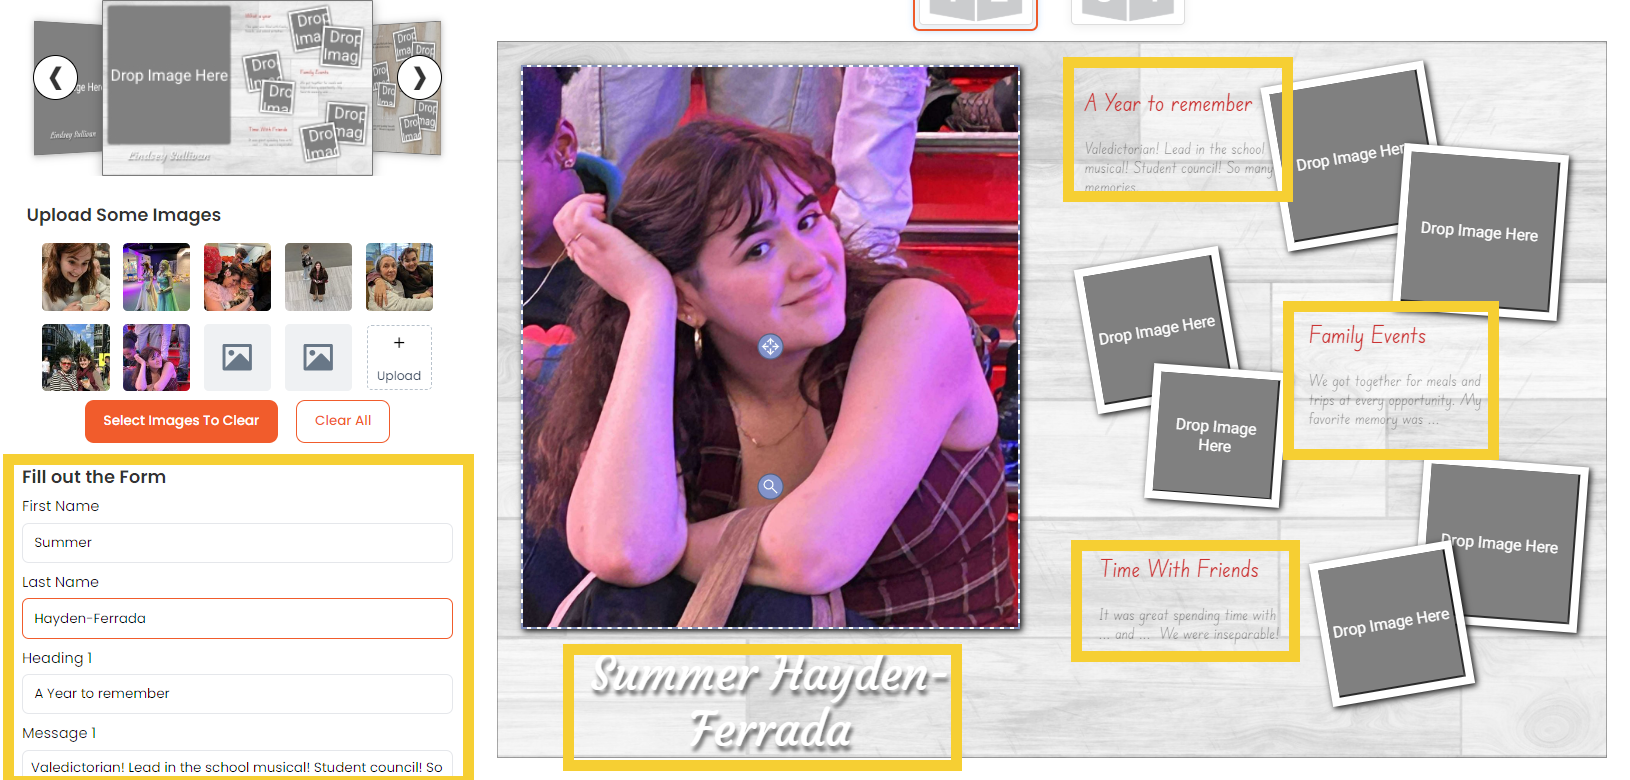 |
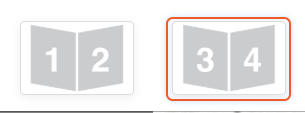
- For 4-page templates, click on the second set of pages to complete the layout using the same instructions listed above.
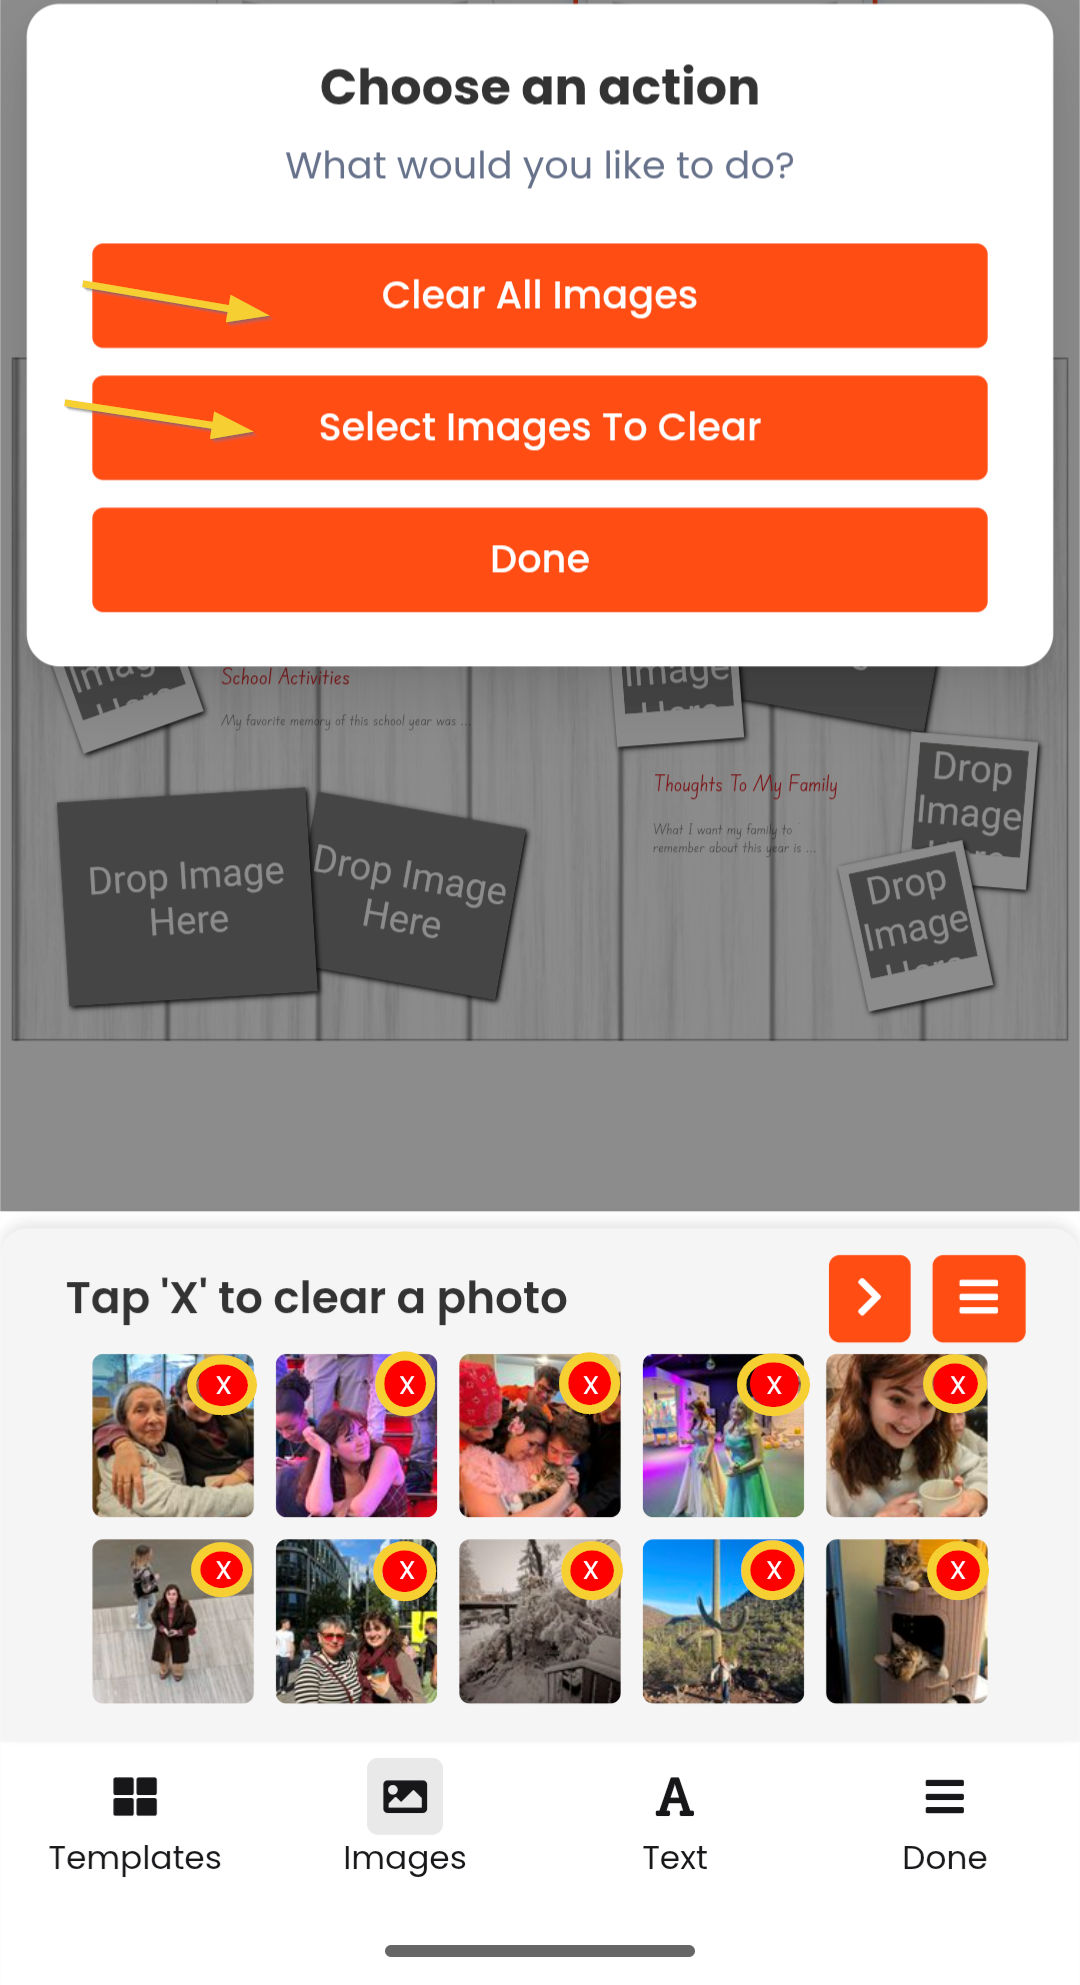
- Need to add more images? Delete used images then upload more.
On mobile, click on the image menu. Choose to Clear All Images, or to Select Images To Clear. When the images are deleted, click Done. 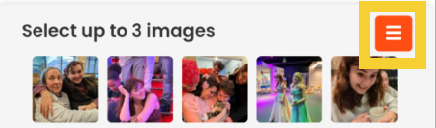
On a computer, click Select Images to Clear or Clear All. Click on the X on each image to remove them individually. 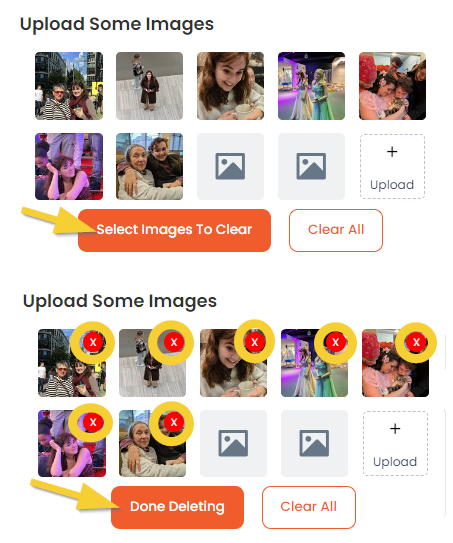
Step 6: Save your design or add to cart if it is completed.
On mobile: Click the Done tab. If your design is completed, add to cart. If more work remains, choose Save For Later.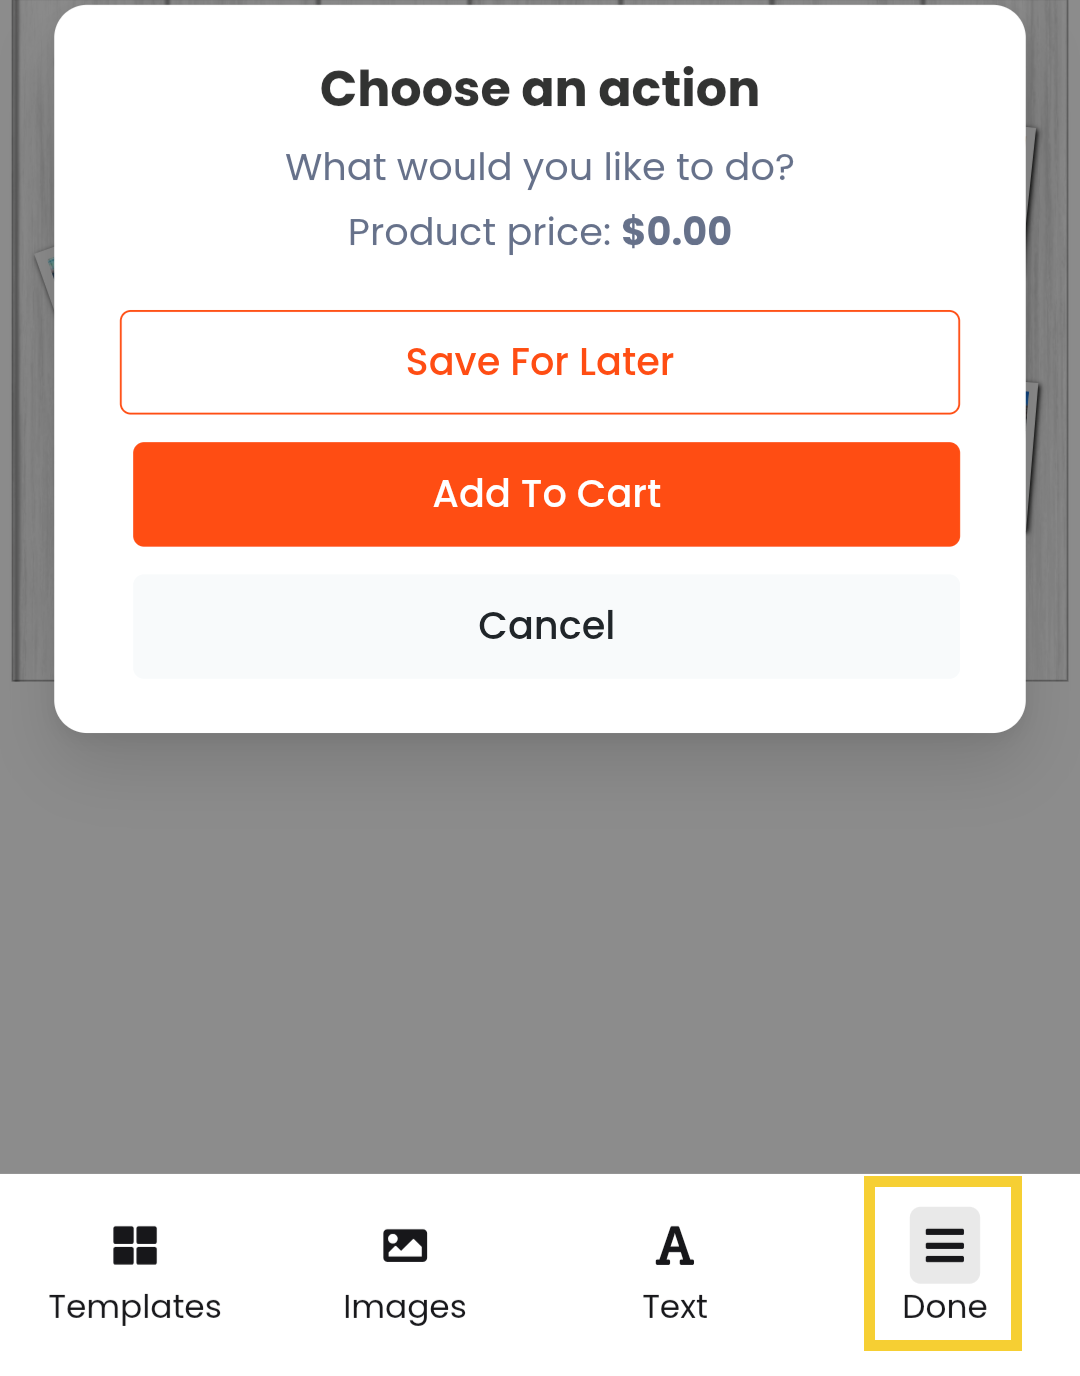 | On a computer: scroll down to the end of the custom text form. If your design is completed, add to cart. If more work remains, choose Save For Later. If adding to cart, enter student information into the form. 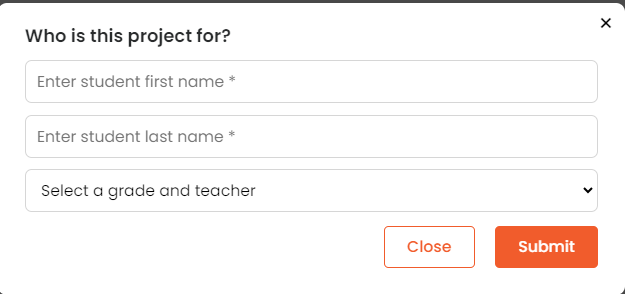 |
Last, confirm that your design is ready to add to cart. It will be finalized with no further edits possible after your purchase is complete. The design will be sent to print when the yearbook design is complete, with your pages added into your child's book.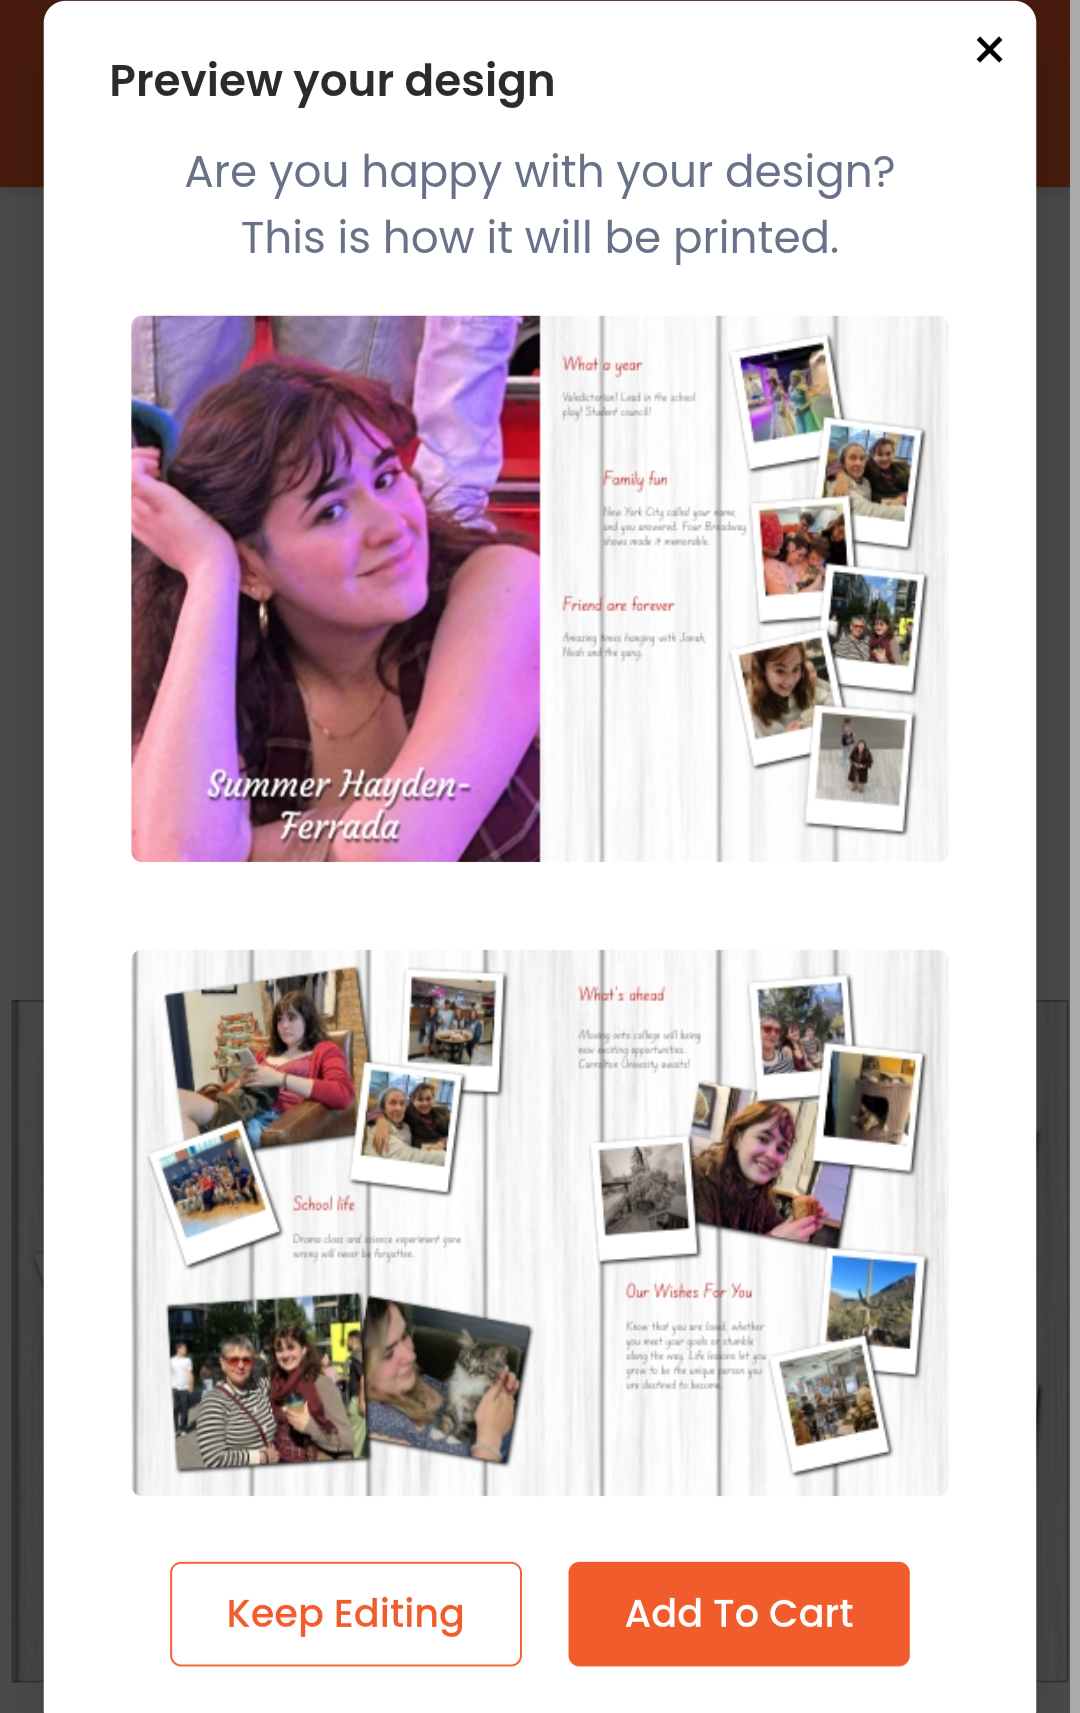
Was this article helpful?
That’s Great!
Thank you for your feedback
Sorry! We couldn't be helpful
Thank you for your feedback
Feedback sent
We appreciate your effort and will try to fix the article